'Jessica' was designed because I simply love all my clothes oversized (especially my tops) at the moment. It's only been the past couple of months where my style has changed. I wouldn't say its changed drastically, but it has a more comfortable and relaxed look about it.
I have been on the hunt for an oversized singlet for months and still haven't come across one that I liked. Thats why I thought it would be a great idea to create one myself. And that is how 'Jessica' came about.
This pattern is all about the choice of fabric you choose to use. It defines the way it drapes and the aesthetic of the finish garment. Both the arm and neck holes are left as a raw edge finish. You can also leave the hem as a raw edge as well, or turned up and straight stitched.
THE JESSICA PATTERN
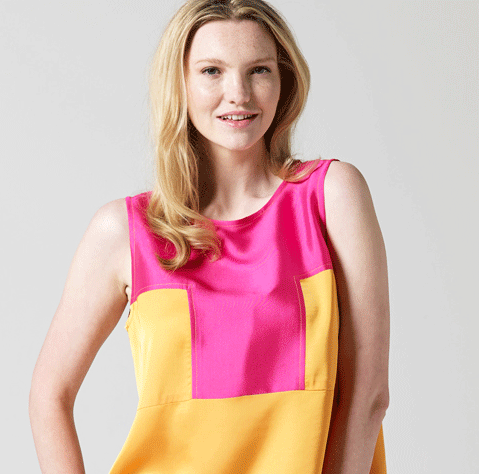
An oversized, raw edge, slouch singlet.

* All of the PDF sewing patterns are suitable for both US letter and A4 paper. Perfect for all sewers to sew anywhere in the world. I am trying to make sewing fun and convientant for everyone.
Recommended Fabric
Equipment Required
Preparing your pattern
STEP 1. Printing out your pattern you can either do from your home or print professionally. Your downloadable files contain your sewing guide, PDF pattern and an A0 file to print professionally.
Print out the first page of your pattern and measure your test square to make sure that measuring correctly before printing out the other pages of your pattern.
Place all pattern pages together and stick them down.

STEP 2. Each downloadable file contains 3 sizes. Ensure to choose your size correctly.
Once printed out, (if printed in black and white) use a colour marker to out line your size before you cut out.

STEP 3. Following the straight line, cut carefully. The dotted line is your stitching line.

Placing the pattern onto your fabric
STEP 4. Laying out your pattern can take some time. Take your time and make sure to read the cutting instructions on your pattern.
For some, depending on your size of patterns and the width of your fabric you may be able to fold your selvages in, meeting them in the centre and creating fold lines mirroring one another. Place pattern pieces on fold lines, pin and check to make sure fabric is fitting on both patterns before cutting out.
If above doesn't apply to you, fold your selvages together creating one fold line. Place patterns on the fabric, right up close to the fold line. Pin in place and cut out your patterns using sharp fabric scissors.

Time to sew
STEP 1. Both shoulder and side seams are a French Seam.
Place fabric wrong sides together. Pin your shoulder and side seams making sure everything lines up.

STEP 2. Before you start sewing make sure to test your sewing machine first. This is to ensure your stitching settings are correct. I always like to use the same fabric as my garment to test.

STEP 3. Sew your seams together using a 1cm seam allowance for both shoulder and side seam.

STEP 4. Cut back your seam allowance, by half or as close as you can to your stitching line.

STEP 5. Turn your garment inside out. Using your forefinger and thumb role your seams, pinning and making sure that your other seam allowance is caught within your newly forming french seam.

STEP 6. Once seams are pinned, your want to sew; incasing your first seam. Seam allowance needs to be 0.5cm or foot width apart. This is creating a french seam.
This is a great time to iron your garment and cut all loose thread.

STEP 7. Taking up your hem. This step is optional.
Using your measuring tape you want to pin, turning back your hem 1.5cm or 5'8" of an inch. Iron in place before you sew if this makes it easier for your to start sewing.
Sew your hem up making sure your foot is right up close to the edge of your finished fabric.

STEP 8. Iron your hem and cut all loose thread.

Watch & Learn
Keeping sewing simple, I have also created a tutorial showing you how to sew the 'Jessica' pattern from start to finish. Watch and follow along, share with your sewing friends and leave me a comment to tell me what you think.
I hope you love this pattern as much as I do. Don't forget to share your creations in the Facebook group.
Georgina xx